Did you get a new internet service provider or change your Wi-Fi password? Follow these instructions to get your Fronius Inverter re-connected!
Before you start…
Note This process is best done on a laptop computer or tablet
Please note that the Fronius interface will be very small and you will need to zoom in to find what you are looking for!
Instructions
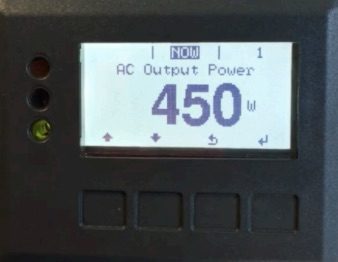
You will need to perform these steps while standing next to your inverter. On the front of your Fronius inverter, locate the screen and note that it has 4 buttons below it: Up, Down, Back, & Enter
Step One: Activate Access Point
1. Press the BACK button to enter the menu options.
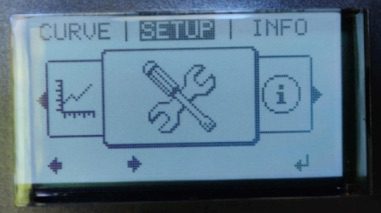
2. Press DOWN until you see the menu option “SETUP”, then press ENTER.
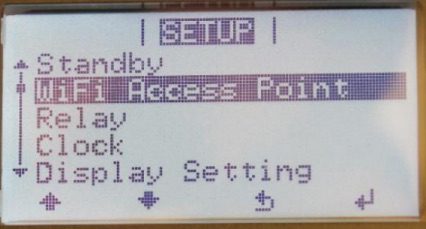
3. Once inside the “SETUP” menu, press DOWN until you see “WiFi Access Point”, then press ENTER.
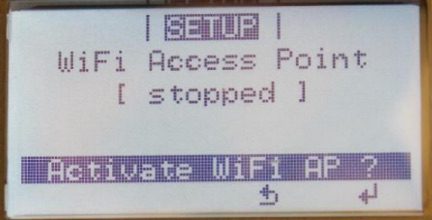
4. A message will appear that says, ‘Activate WiFi AP?’, press ENTER. This will activate the WiFi access point.
Note: the numerical password is displayed onscreen
Step Two: Login to Inverter
5. Using your device; open your WiFi Settings.
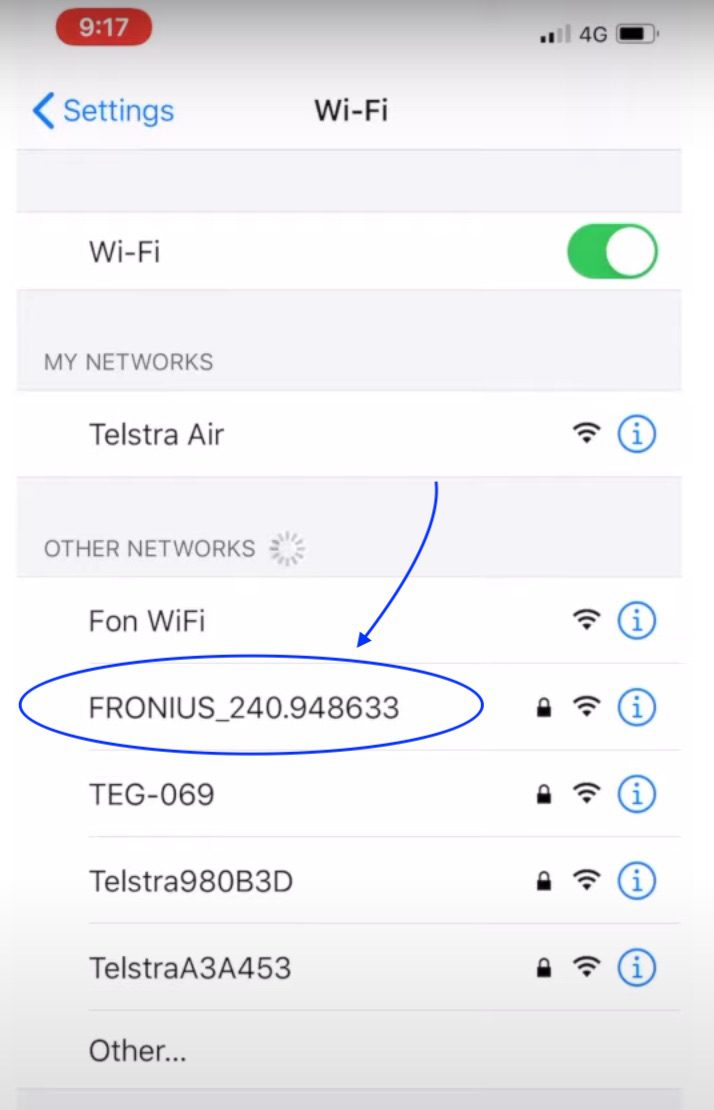
6. Select the Fronius Inverter Network (FRONIUS_240.# # # # #). The numbers at the end will be specific to your inverter.
When prompted, enter the password that is displayed on the inverter screen (12345678)
Please note: your device may state that no WiFi is available with this connection and try to disconnect. Connect anyway and proceed. If you do not connect, the next steps will not work.
Step Three – Configure WiFi
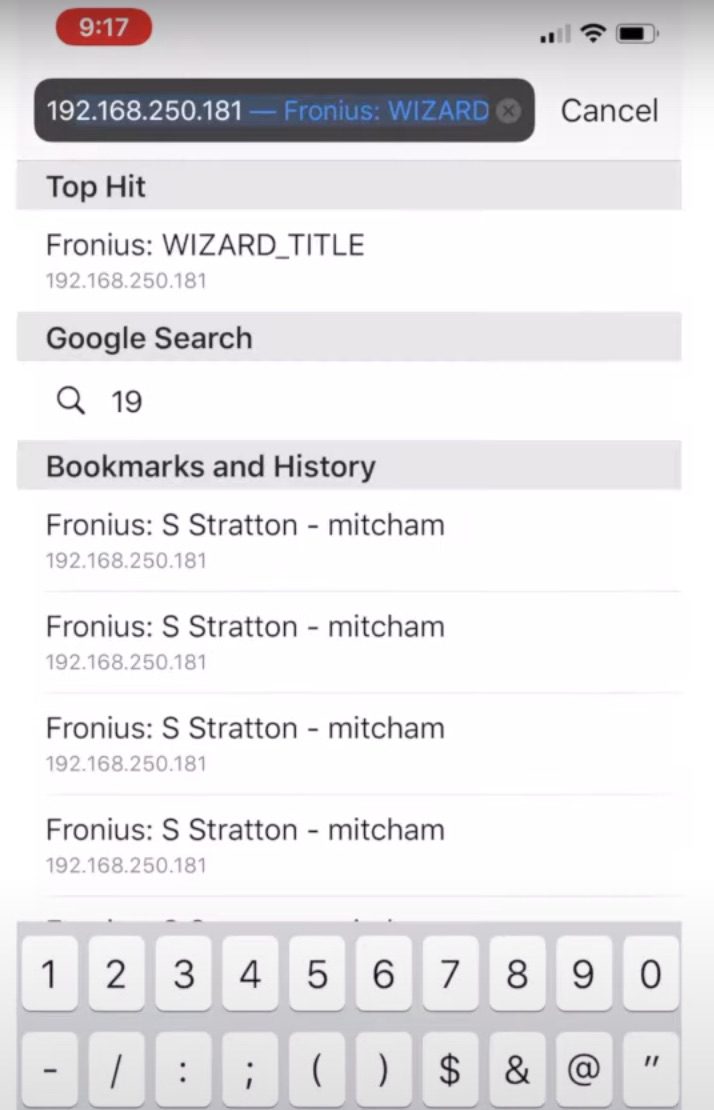
7. Using your WiFi-enabled device; open your a web browser (we recommend Google Chrome in “Incognito Mode”)
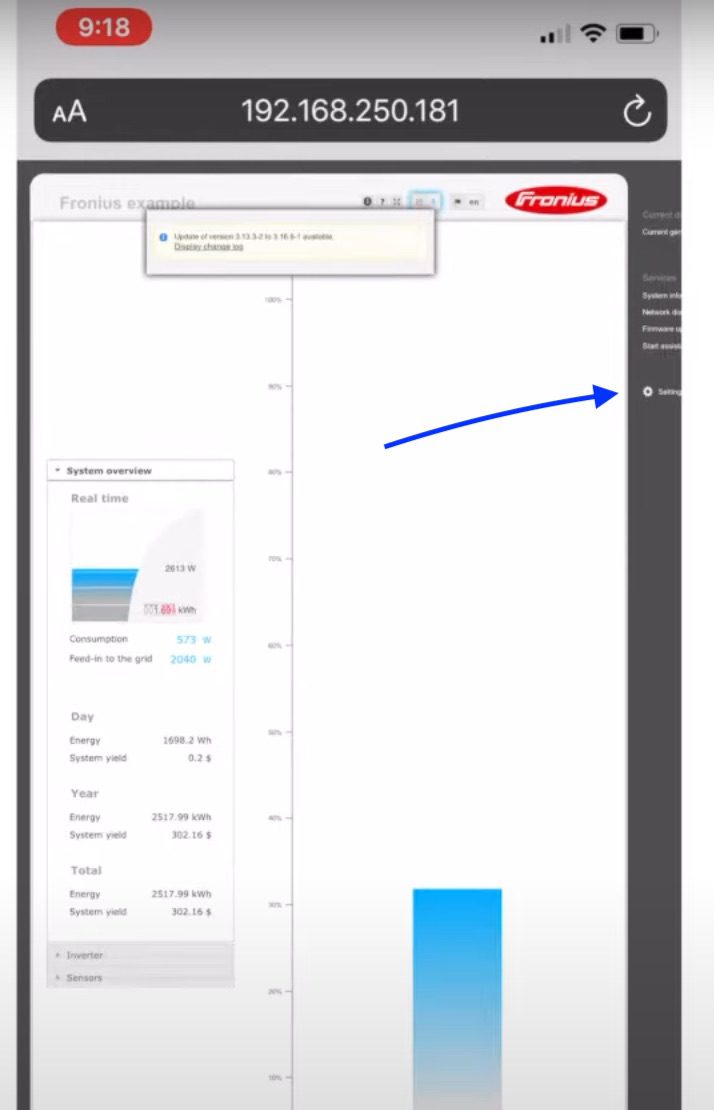
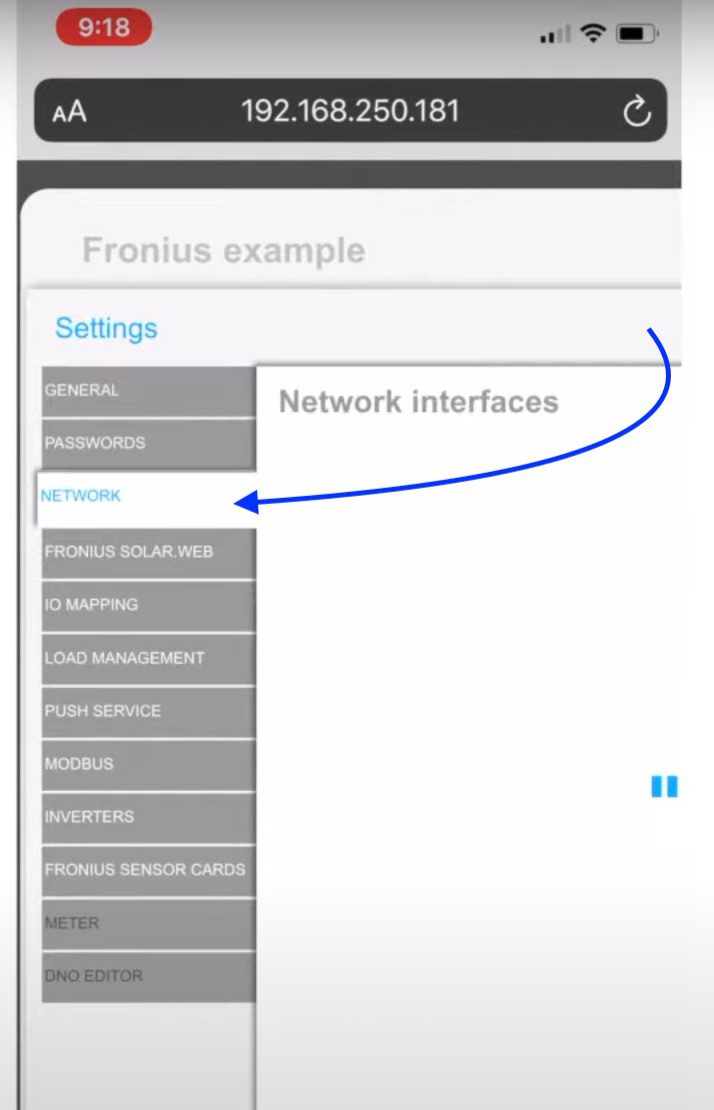
8. Type in your search bar 192.168.250.181 and hit enter. The Fronius page will load.
9. In the dark gray menu on the right side, select the “Settings” option at the bottom.
10. In the light gray menu that appears on the left side, select the “Network” tab.
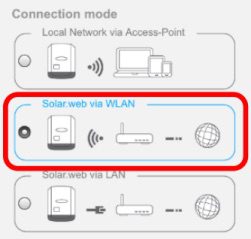
Note: In the first section, make sure the connection mode “Solar.web via WLAN” is checked
11. Under WLAN Settings, locate your home network from the list of options, highlight it, and then select “Set”

12. A pop-up will appear. Enter your home network password (check the box to ensure you are entering the correct password). Select “Save”.
13. Go to the top right corner of the page and select the “✔”.
When a pop-up appears saying “New settings will now be applied”, you are finished web-connecting your Fronius inverter.
If you have questions, please reach out to the Ecotech Solar Services Team at service@ecotechsolar.com or text us at 360-685-1232.